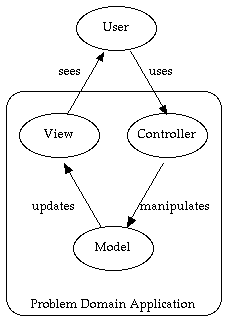
This article lays out the steps for installing Struts and a basic "Hello World!" sample application 'from scratch.' It assumes that you are brand new to Struts and that you're also fairly new to Java ServerPages (JSP) and programming in general.
The goal of this article is to go through the basics of installing and building a Struts application; the details of the application itself are not covered. The application is taken from my recent book, Struts Kick Start, and is covered in detail there. The application and build files described in this article can be downloaded from the book's companion Web site (http://www.strutskickstart.com).
Although some of the material in this article may seem very basic to an experienced Java developer, I've had a number of people express frustration to me that they were unable to locate a set of very basic instructions for installing Struts and getting a beginning application running. This is the problem addressed by this article.
Before we begin, it's worth stating that Struts does require some knowledge of Java and JSP to be used effectively. If you are brand new to Java Programming or JSP, it's recommended that you get some base knowledge of those technologies before diving too deeply into Struts. Spending a little extra time preparing yourself will make learning Struts a lot less frustrating for you.
Preparing your Computer to Install Struts
Before you install Struts, there are some configuration steps that need to be completed on your machine. This section leads you through those steps and gets you ready to install and begin working with Struts.
While this article assumes you have a computer running one of the Microsoft Windows operating systems, modifying the steps to work under Linux (or some other Unix variant) would require only minor changes.
Installing Java
Struts is based on Java, so running it requires you have Java installed. This article uses Sun's Java 2 Platform Standard Edition v1.4.1 (also known as JDK 1.4.1). The JDK 1.4.1 can be downloaded free from Sun's Web site at http://java.sun.com/j2se/1.4.1/index.html. Earlier versions of Sun's JDK can be used, but 1.4.1 is the most current version.
If you've done any programming in Java, it's likely that you already have this (or some other) version of Java installed. To see if you have Java installed already (or to see what version you have), from a command line, simply type "java -version". The output from this command run on my computer is as follows:
// Testing your Java Installation.
c:\dev>java -version
java version "1.4.1_01"
Java(TM) 2 Runtime Environment, Standard Edition
(build 1.4.1_01-b01)
Java HotSpot(TM) Client VM (build 1.4.1_01-b01, mixed mode)
If running this command doesn't show that you have a version of Java installed, you need to install a JDK on your computer before you can install Struts. Installing the JDK is like installing any other application on your machine. I'd recommend just following the defaults unless you have specific reasons not to. You can download the JDK from the link above.
Once Java is installed, you need to ensure that you have two environment settings configured. They are:
* Set JAVA_HOME to point to the top level directory where your JDK is installed. On my machine, I installed the JDK 1.4.1 in the directory C:\j2sdk1.4.1_01 so that's the value I would use as my JAVA_HOME.
* Add JAVA_HOME\bin to your path so that you can execute the java program itself. In my case this means adding the directory c:\j2sdk1.4.1_01\bin to my PATH variable.
Because each version of Windows (or Unix shell) provides a slightly different way of setting environment variables, you'll have to refer to other documentation to determine how to do this for your environment. After you've completed these steps, you should be able to open a new window, type the java -version command and see output similar to the example above.
Installing Ant So You Can Build Web Archive (WAR) Files
Once you've verified that you have Java installed correctly, the next thing you need do is install Ant. Ant is a program used to compile, build, and deploy Java programs. It, like Struts, is an open source program from the Apache Software Foundation. Ant is widely used by Java developers for all kinds of tasks related to building, testing, and deploying Java applications. Ant is available for free from the the Apache Ant Project's Web site at http://ant.apache.org/.
You need to have Ant installed because there is more to running Struts programs than simply compiling your java files. Struts applications are stored in what are called Web ARchive files (also called "WAR" files). Ant coordinates the process of taking your Java files, your JSP files, and all the other files that make up a Struts application and using them to build the WAR files that are needed to run the application.
WAR files are defined as part of the Java 2 Enterprise Edition (J2EE) standard. This is the same standard that defines the operation of Tomcat (and other servlet engines). Among the other Java technologies defined by the J2EE standard are Enterprise Java Beans (EJBs), the Java Message Service (JMS), and Java Mail. Using JSP and WAR files is a great way to get introduced to the J2EE standard.
Installing Ant is required to take advantage of the automated build scripts provided for the sample application. If you are currently a Java developer, you likely have Ant already installed. If you don't have it installed, this section provides the steps you need to follow to install it.
Similar to verifying your Java installation, you can verify your Ant install by typing the command ant -version. The results of running this command on my computer are shown below:
// Testing your Ant Installation.
c:\dev>ant -version
Apache Ant version 1.5.1 compiled on October 2 2002
To install Ant, simply download its binary files from http://ant.apache.org and unzip the downloaded file into a convenient directory. For myself, I installed Ant into a directory named C:\jakarta-ant-1.5, but then renamed the directory to C:\ant to keep things simple.
Similar to installing Java, you now need to change two environment settings for everything to work. They are:
* Set ANT_HOME to point to the top level directory where Ant is installed. On my machine, this value is C:\ant.
* Add ANT_HOME\bin to your path so that you can execute the Ant program itself. In my case, this means adding the directory C:\ant\bin to my PATH variable.
To verify your installation, you can type ant -version to verify that Ant will run. The output should be similar to what you see in the section above. Now Ant should be installed and configured correctly and we're ready to install the Apache Tomcat server.
Installing Tomcat
Apache Tomcat is referred to as a "Servlet Engine" or "Servlet Container." This means that it conforms to the standards defined for running applications based on Java Servlets and Java ServerPages. (In fact, Tomcat is the 'Reference Implementation' of these standards.) Because Struts is based on Java Servlet and Java ServerPages technologies, you need a servlet container for your Struts applications to run.
There are a great number of other servlet containers available including Weblogic, Websphere, Resin, and many more. We're using Tomcat because it is widely available and easy to find and install. If you need Tomcat, you can download a copy of it from the Apache Jakarta Project at http://jakarta.apache.org/tomcat.
There are a number of ways to install Tomcat. We will install using the Win32 installation file jakarta-tomcat-4.1.12.exe. This install uses an installshield-like installer from nullsoft. The only change to the default installation I'd recommend is overriding the installation location to some path that does not contain spaces (I used \dev\tomcat). I've seen situations where having embedded spaces in the path to the Tomcat files can cause problems during the Ant build process.
After you've completed the Tomcat installation, you should be able to start Tomcat and then open a browser on your machine and point it to the location http://localhost:8080/ to see the default Tomcat info page.
Installing Struts
Now that we have all the preliminary work completed, it's finally time to install Struts!
There are two sets of files that make up Struts: The Struts binaries (as they are referred to on the Struts site) and the Struts source files. This section only discusses the binaries because these are what you use to develop Struts applications. If you don't already have a copy of Struts, you can download it via the Jakarta Struts home page at http://jakarta.apache.org/struts. Get the binaries of the latest release of the 1.1 version of Struts.
From the perspective of someone developing applications, the Struts binaries are really just a collection of files. These files (.jar's, .tld's, .properties, and si forth) contain the Struts application files along with configuration information, error messages, and so on.
Installing Struts is really just copying all these files on to your computer in a way that makes it convenient for your application to access them. This is why there's no setup.exe installation file for Struts—all you do is unzip Struts into a directory and start working!
On my computer, I unzipped Struts into the C:\dev\jakarta-struts-1.1-rc1 directory and then renamed it to C:\dev\struts to make it easier to work with. This is all that's required to install Struts.
Compiling and Running the Hello World Example Application
One of the critical factors in being successful as a developer is making sure you have an efficient Edit/Compile/Test process. The goal of this section is to provide a simple and efficient way to get this process organized.
There are many options with regard to the 'editing' part; they range from text editors such as Notepad, vi, and emacs up through powerful IDEs such as JBuilder, IntelliJ, and Eclipse. (Personally, I use Eclipse from http://www.eclipse.org). This article doesn't cover editing options, so let's discuss the build and test parts of the equation in a bit more detail.
The value that Ant provides is that it greatly simplifies the build and test process. Ant uses an XML script to direct all the actions required for compiling the Java files, building the WAR file for you, and then deploying the WAR file into your servlet container. In the case of Tomcat, deploying the WAR file means just copying it into the TOMCAT_HOME\webapps directory (where TOMCAT_HOME represents the top-level directory for your Tomcat installation, for example C:\dev\tomcat).
Getting the Example Application
The example application is available at http://www.strutskickstart.com. It is the Hello World! application. To install it, simply download it and copy it into a convenient directory on your computer.
For this sample application, an Ant script is already written. This Ant script loads the properties it needs to work on a particular computer from a properties file. This properties file contains the directory paths it needs to locate the Tomcat installation on your machine. This file is named build.properties and is shown below:
// The build.properties file.
tomcat.home=c:/dev/tomcat
webapps.home=c:/dev/tomcat/webapps
To modify this file, simply edit it and replace these two values with the appropriate values for your computer.